Create Your First Workspace
Your JIVIQ Workspace is where your customer conversations and customer-facing setup begin. After you verify your email and sign in for the first time, JIVIQ asks you to create your first Workspace. This guide explains exactly what to do and what happens next.
A Workspace serves as the front door for your customer chat. Whether a customer opens your chat widget, joins a call, or asks an AI question, everything operates through your Workspace. Learn more about JIVIQ on the official homepage.
Before You Start
Make sure you have completed the initial account prerequisites before setting up your workspace:
1. JIVIQ Account Signup
Completed the registration form on app.jiviq.com/signup.
2. Email Verification
Verified your address by clicking "Verify Email" in the message from support@jiviq.com.
3. Account Credentials
Access to the work email and password chosen during signup.
4. Admin App Access
Direct access to the JIVIQ sign-in page at app.jiviq.com.
If you haven't verified your email yet, follow our step-by-step guide: How to verify your JIVIQ email.
Step-by-Step: Creating Your First Workspace
Follow these simple steps to go from your first sign-in to a fully active JIVIQ Workspace:
Sign In to JIVIQ
Navigate to https://app.jiviq.com/ and sign in with the same email and password you used during registration.
Signing in after email verification completes your account creation. Once your credentials are confirmed, JIVIQ automatically presents the first Workspace creation screen.
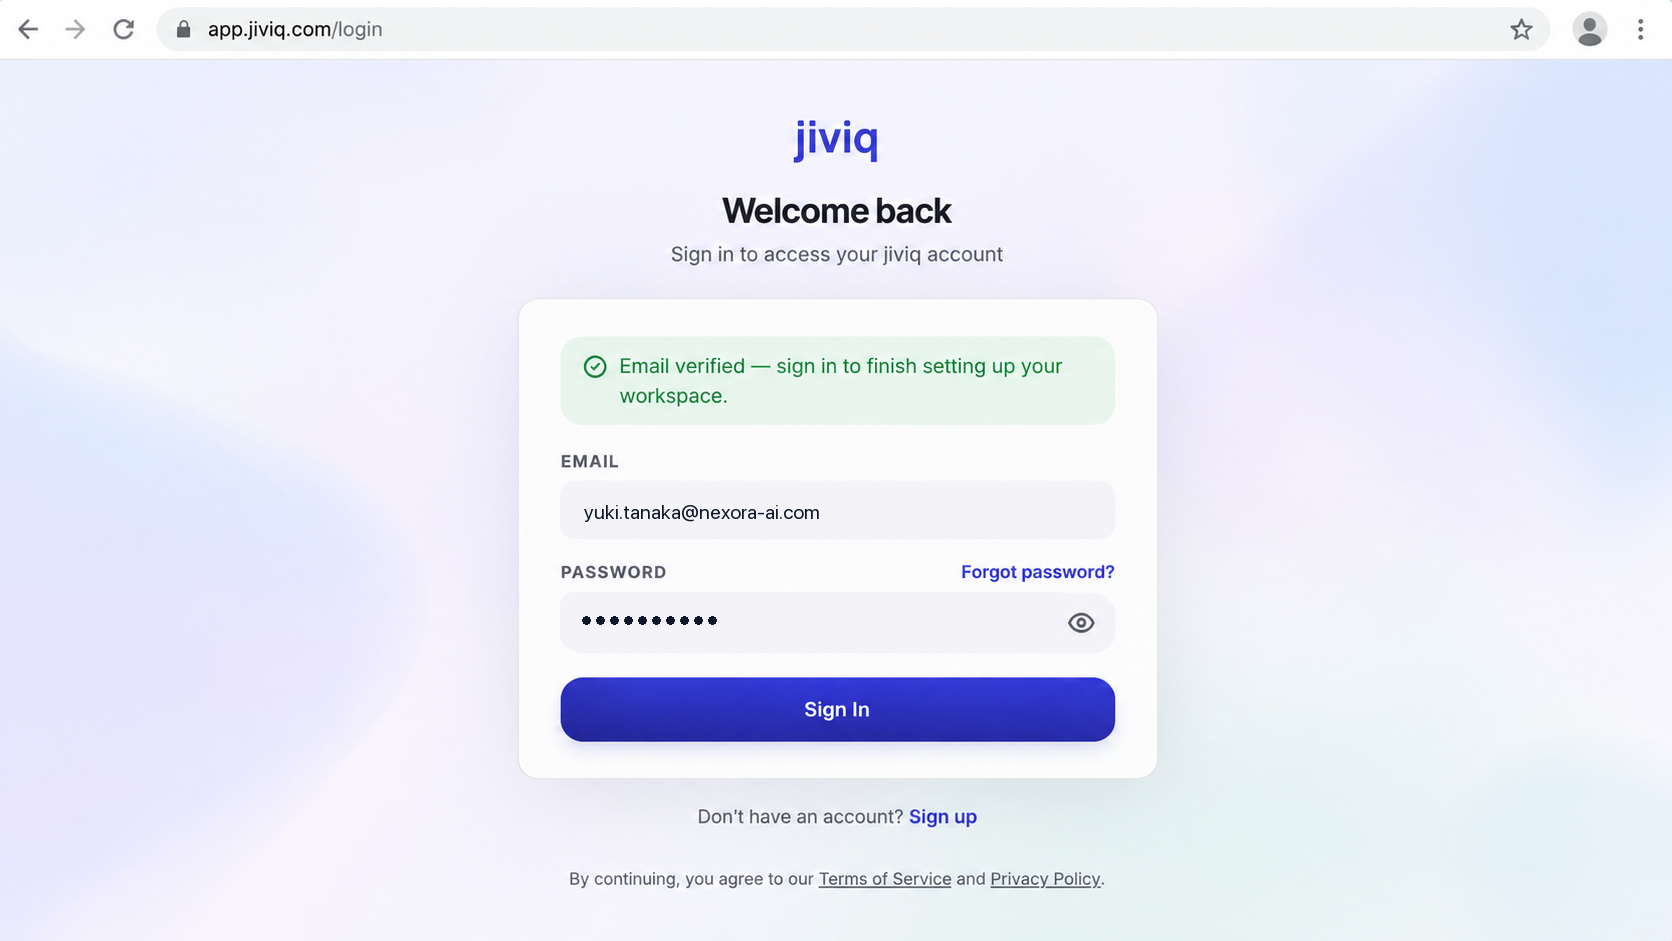
app.jiviq.com with your verified email (yuki.tanaka@nexora-ai.com) and password to initiate Workspace setup. Start Creating Your Workspace
After your first successful sign-in, JIVIQ detects that your account is new and opens the Workspace initialization screen.
You will see a welcoming setup interface prompting you to establish your company's primary communication channel using the official "Create Workspace" workflow.
Review Your Workspace Name
JIVIQ automatically pre-fills the Workspace name with the business name you provided during signup.
Take a moment to review this name. If you wish to use a different display name for your customer-facing chat presence (e.g., adding "Support" or shortening your company name), you can edit the text field before proceeding.
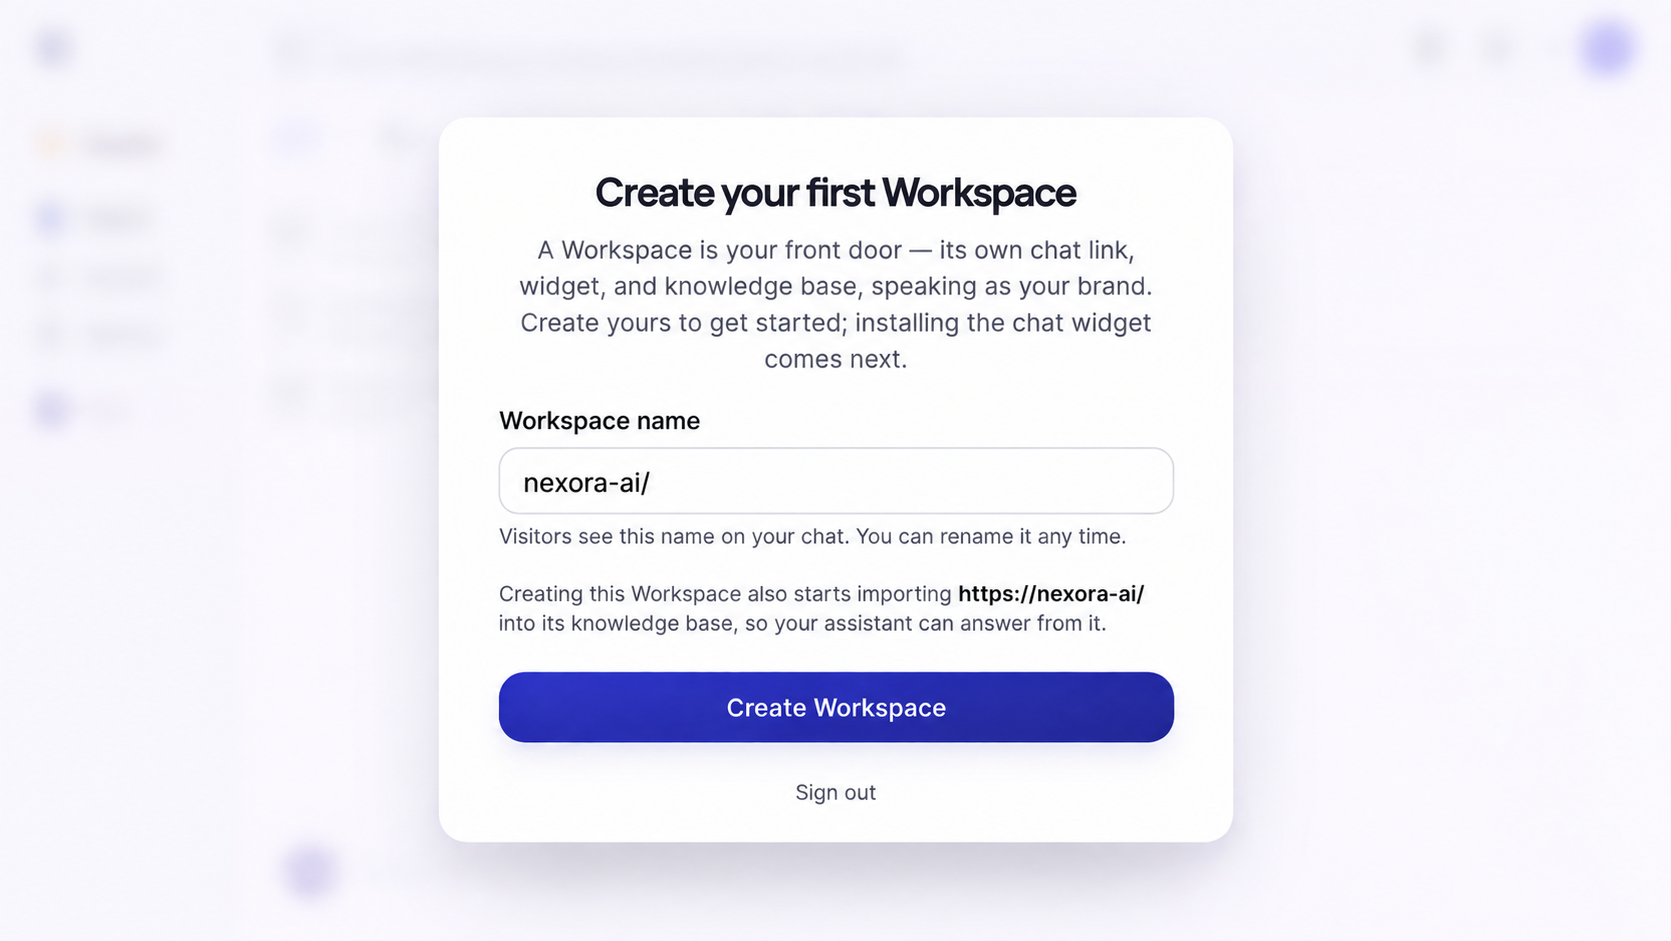
Create Your Workspace
Once your Workspace name looks good, click the blue "Create Workspace" button.
JIVIQ creates your Workspace environment immediately and loads your workspace overview, preparing your unique chat links, widget scripts, and AI assistant.
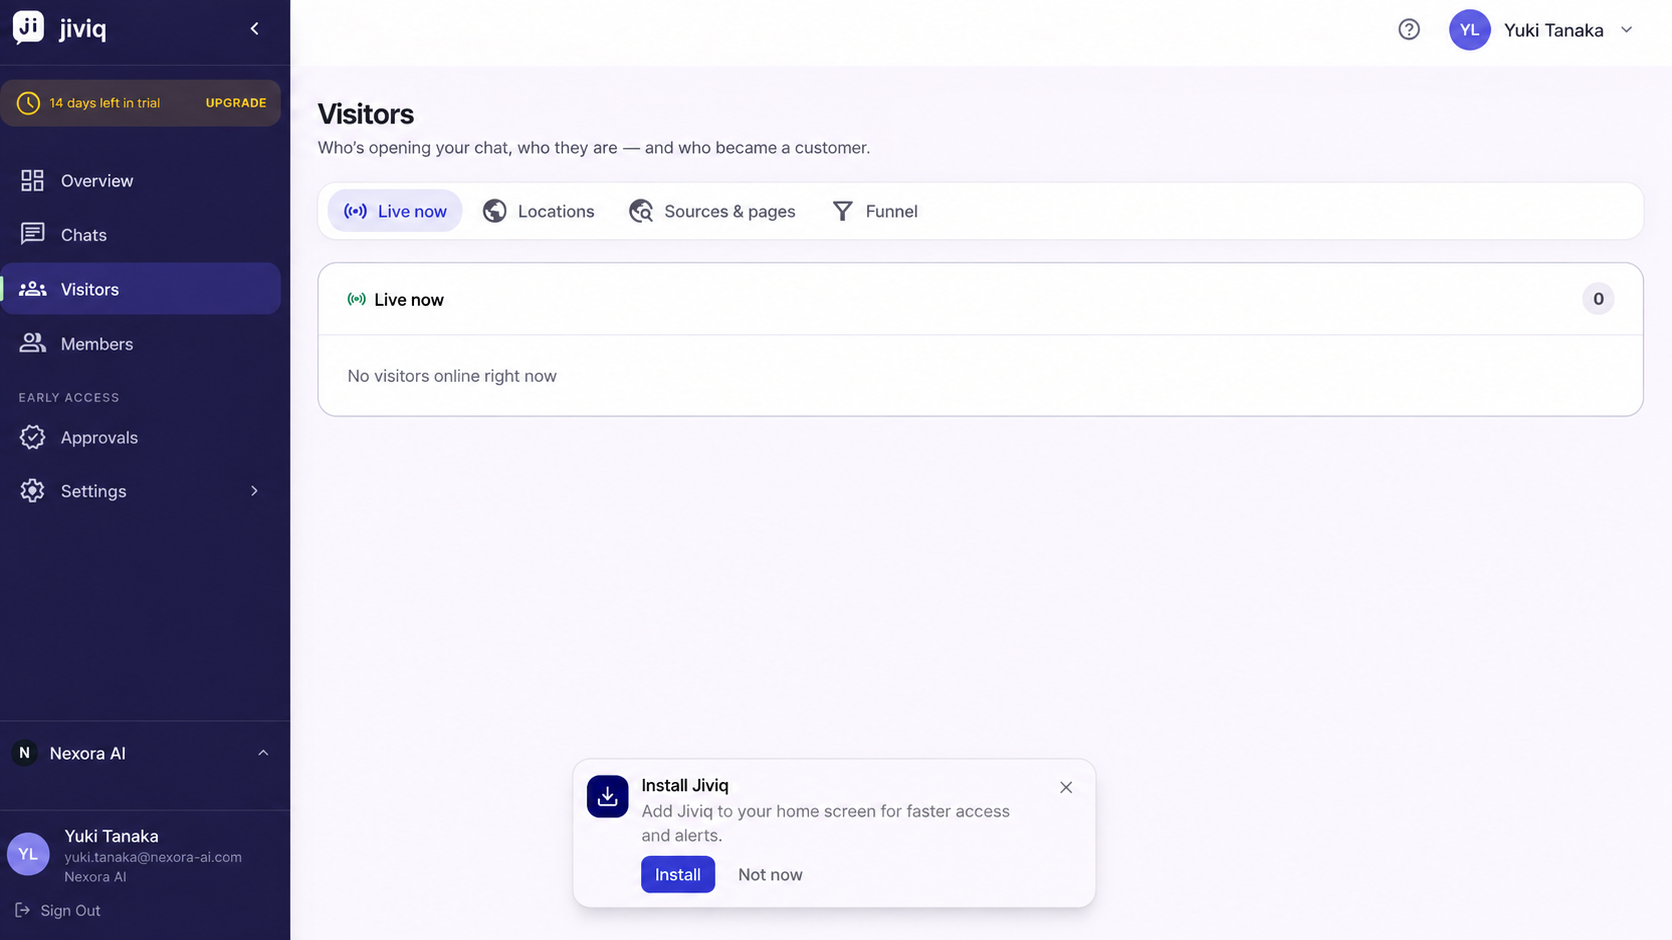
Understand What Your Workspace Includes
Your Workspace is the customer-facing home for your JIVIQ setup. It brings together all the tools needed to manage real-time conversations, automated AI answers, and customer context:
Dedicated Chat Link
A direct standalone link you can share with prospects in emails, bios, and messages.
Website Widget Code
A lightweight script snippet to embed live AI chat and voice calls directly on your site.
Knowledge Base
The repository where you import website URLs and documentation for verified AI answers.
Brand AI Assistant
An AI assistant configured to speak in your brand's unique tone and answer customer questions 24/7.
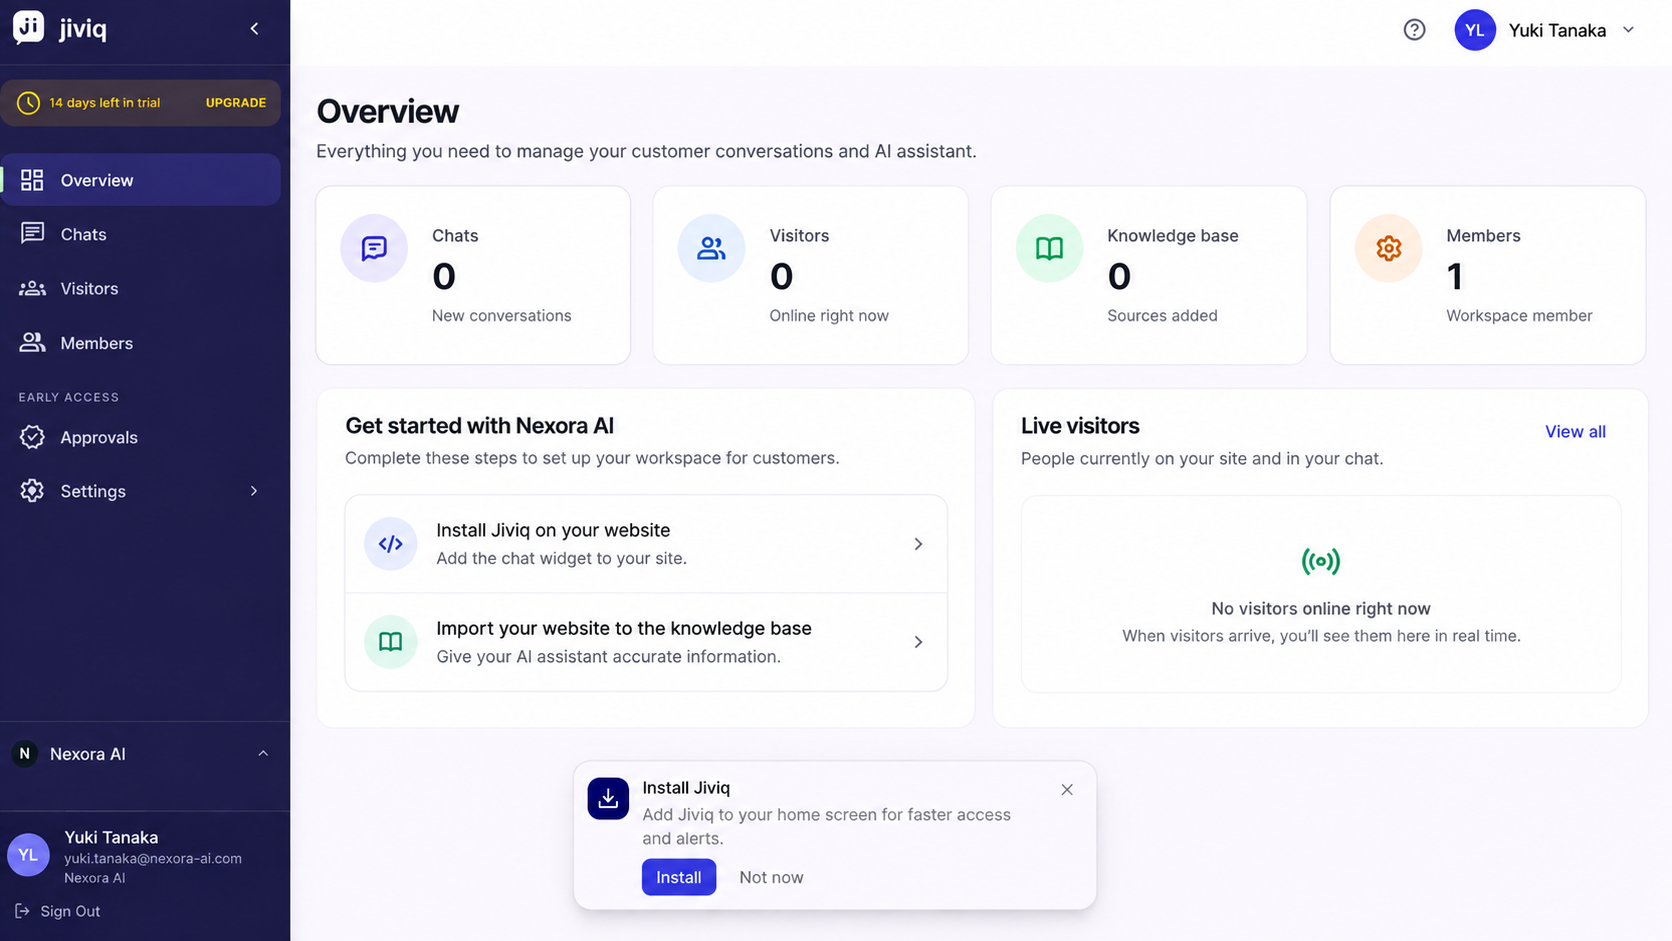
What to Do After Creating Your Workspace
Once your Workspace is created, two essential steps make it fully ready for your customers:
Add the JIVIQ script snippet to your site's HTML header or footer to activate the live chat bubble for visitors. Follow our Install the JIVIQ widget documentation.
Import your website pages and documentation into your Workspace Knowledge Base so your AI co-founder has accurate, verified facts to answer customer questions. Learn more in the JIVIQ Getting Started guide.
Add teammates, founders, and support staff under Settings to collaborate in the unified inbox. Follow the Add Your Team documentation.
Explore what JIVIQ can do for your business across Chat, Audio Calls, Meetings, and Customer Context.
Common Problems and Solutions
Verified answers to common questions encountered during workspace creation:
I do not see the Workspace creation step
The first Workspace creation prompt appears automatically after your first successful sign-in following email verification. If you are experiencing login difficulties, check the Login and Signup Troubleshooting guide.
I need more than one Workspace
Most businesses only need one Workspace. If you run multiple distinct brands or separate customer touchpoints, account owners and admins can add more Workspaces anytime under Settings → Workspaces.
Can I rename my Workspace later?
Yes. You can edit your Workspace name before clicking Create Workspace, or update it at any time in your workspace general settings.
Still stuck or have questions?
If you're unable to complete workspace creation, contact JIVIQ support at support@jiviq.com with your work email and a description of what you see.
Frequently Asked Questions
Browse questions by category to learn all about JIVIQ Workspaces:
A Workspace is the front door for customer chat. Each Workspace has its own dedicated chat link, embeddable widget code, Knowledge Base, and AI assistant that speaks as your brand.
Your first Workspace is the central starting point for configuring JIVIQ. It organizes your customer conversations, website chat widget, and AI knowledge settings in one unified hub.
Most businesses need exactly one Workspace. If you manage multiple separate brands or require distinct customer-facing entry points (like separate sales and support desks), owners and admins can add additional Workspaces later under Settings → Workspaces.
JIVIQ automatically prompts you to create your first Workspace immediately after you sign in for the first time following email verification.
JIVIQ automatically pre-fills your Workspace name using the business name you entered during registration.
Yes. You can edit the pre-filled Workspace name before clicking "Create Workspace" or adjust it later in your workspace settings.
JIVIQ provisions your workspace, sets up your unique chat channels and knowledge base, and brings you directly into your Workspace dashboard.
Each Workspace contains its own chat link, embeddable widget code, dedicated Knowledge Base, and brand AI assistant. Every conversation feeds into your shared customer record by default.
Your Workspace is created instantly, but to make it available to website visitors, you need to complete the setup steps: install the chat widget on your site and import your website into the Knowledge Base.
The two essential next steps are installing the JIVIQ chat widget on your website and importing your website content into the Knowledge Base so your AI has accurate information to answer questions.
Follow the step-by-step instructions in the official Install Chat Widget guide (https://jiviq.com/help/website-installation/install-jiviq-on-your-website) to embed the one-line script tag onto your site.
Importing your website URLs gives the AI assistant direct access to your verified product, pricing, and FAQ content so it answers customer questions accurately.
The first Workspace creation screen appears automatically after your first successful sign-in. If you are having difficulty signing in, review the Login and Signup Troubleshooting guide at https://jiviq.com/help/login-troubleshooting or contact support.
Yes. Owners and admins can create additional Workspaces anytime by navigating to Settings → Workspaces inside the admin app.
You can reach JIVIQ support directly by emailing support@jiviq.com or referencing the official troubleshooting guide at https://jiviq.com/help/login-troubleshooting.
Continue Getting Started with JIVIQ
Review all four guides in the official Getting Started series:
What Is JIVIQ?
Understand JIVIQ's customer communication tools, real-time translation, and context platform.
Create a JIVIQ Account
Learn how to register for JIVIQ, fill in your business details, and solve sign-up issues.
Verify Your Email
Find the verification email, click Verify Email, and finish your first sign-in.
Create Your First Workspace
Learn how to set up your first company workspace and prepare JIVIQ for daily use.