Install JIVIQ on Your Website
Learn how the JIVIQ chat widget is installed on any website using a single line of script. This foundational guide introduces the end-to-end setup workflow using our real-world Nexora AI installation example.
Install JIVIQ
Overview & 9-step roadmap
Currently ReadingAdd Domain
Domain allow-listing & rules
Next →Copy Code
Obtain your workspace script
View →Embed Code
Placement before </body>
View →Verify Widget
Test live chat & inbox
View →Connecting JIVIQ to your website allows your AI assistant and human team to engage website visitors in real-time conversations, answer product inquiries 24/7, and capture qualified leads automatically. Explore JIVIQ on our homepage to see live platform capabilities.
1. Who Can Install JIVIQ & What You Need
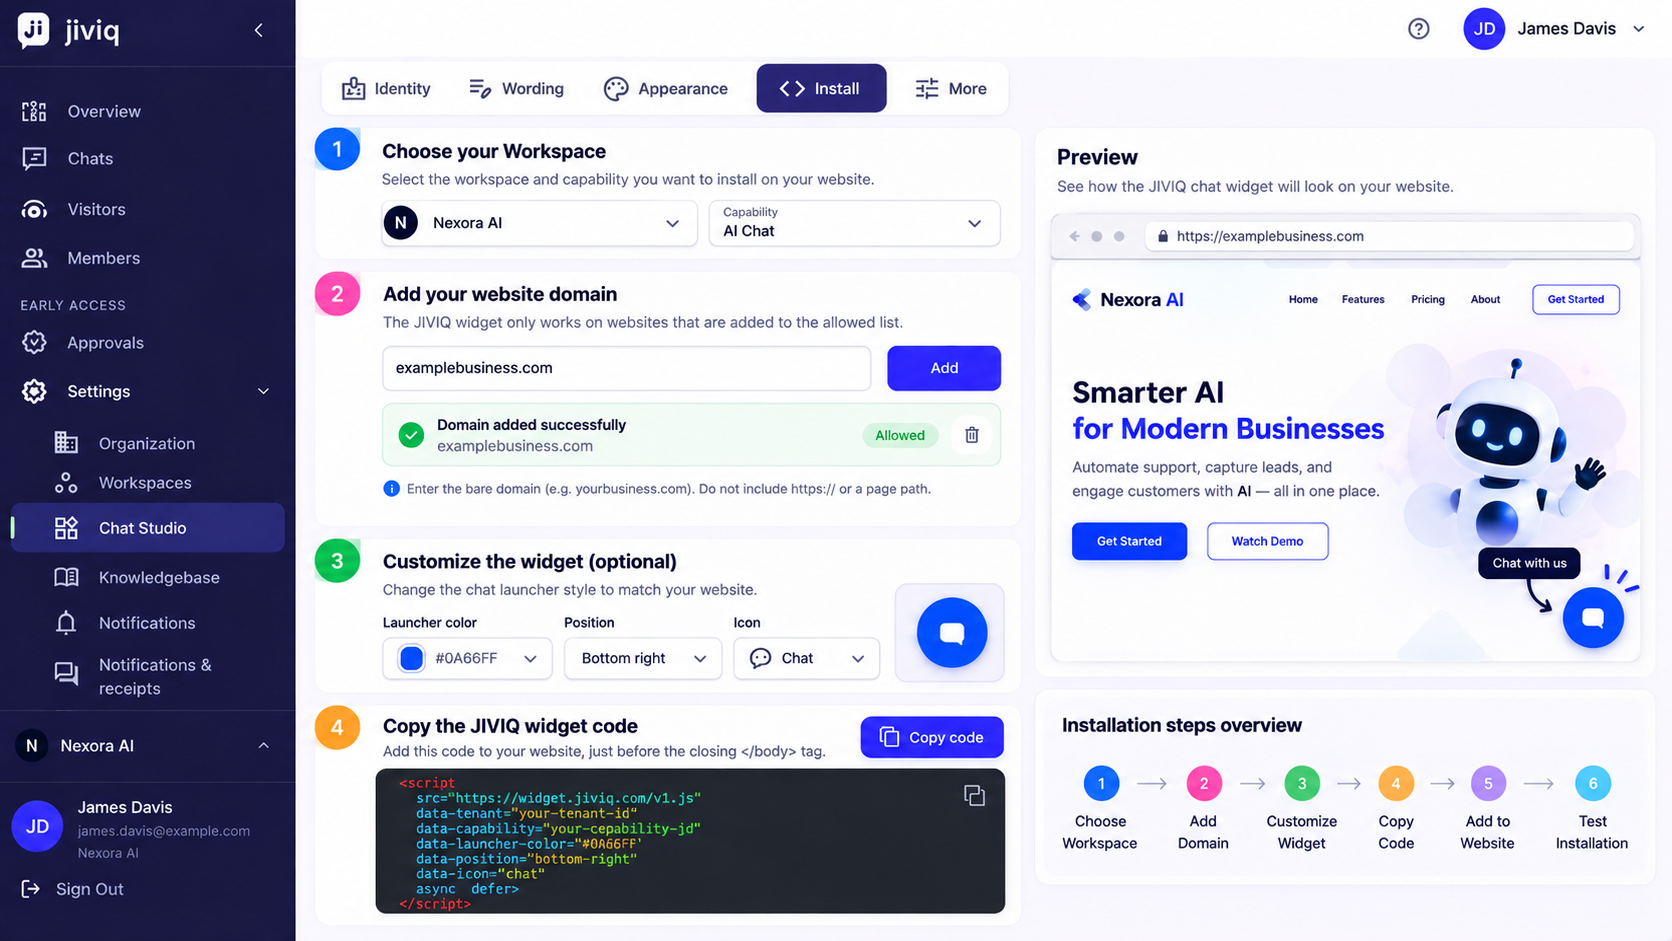
Before embedding the widget, confirm you have the following prerequisites ready:
JIVIQ Admin Access
You must be an account Owner or Admin in JIVIQ to allow-list your website domain and generate widget keys.
Configured Workspace
Ensure your target brand Workspace is active with your desired Knowledge Base and AI responder mode configured.
Website Edit Permissions
You need permission to edit your website's HTML source code, theme template settings, or header/footer script injection tool.
2. The 9-Step Installation Flow
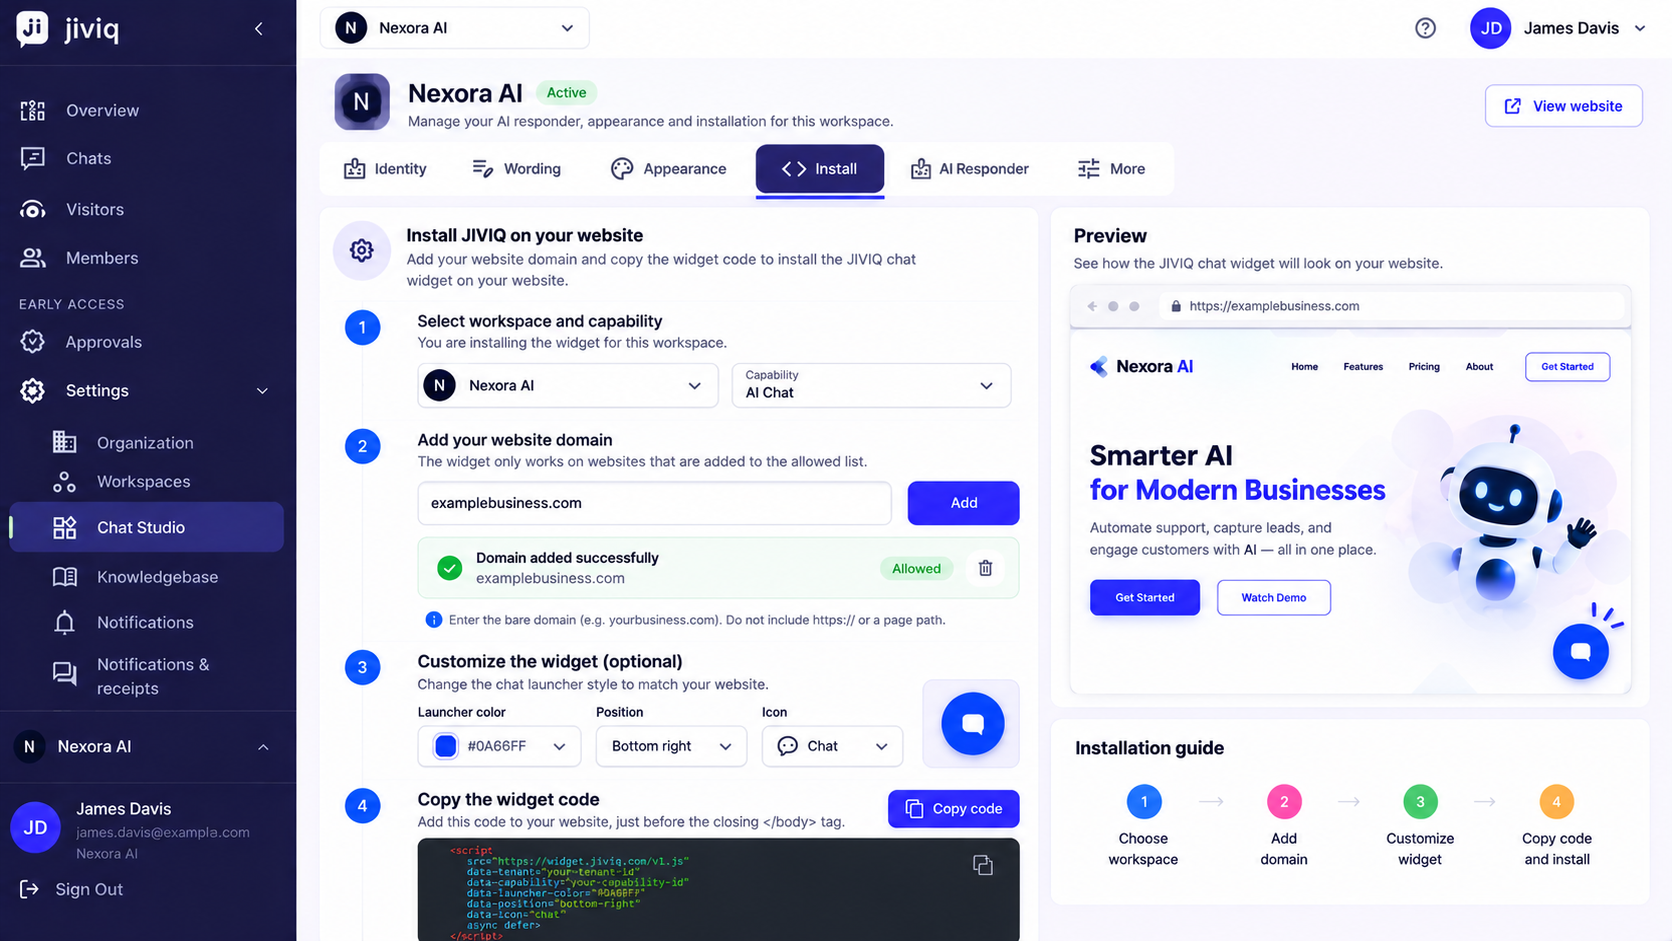
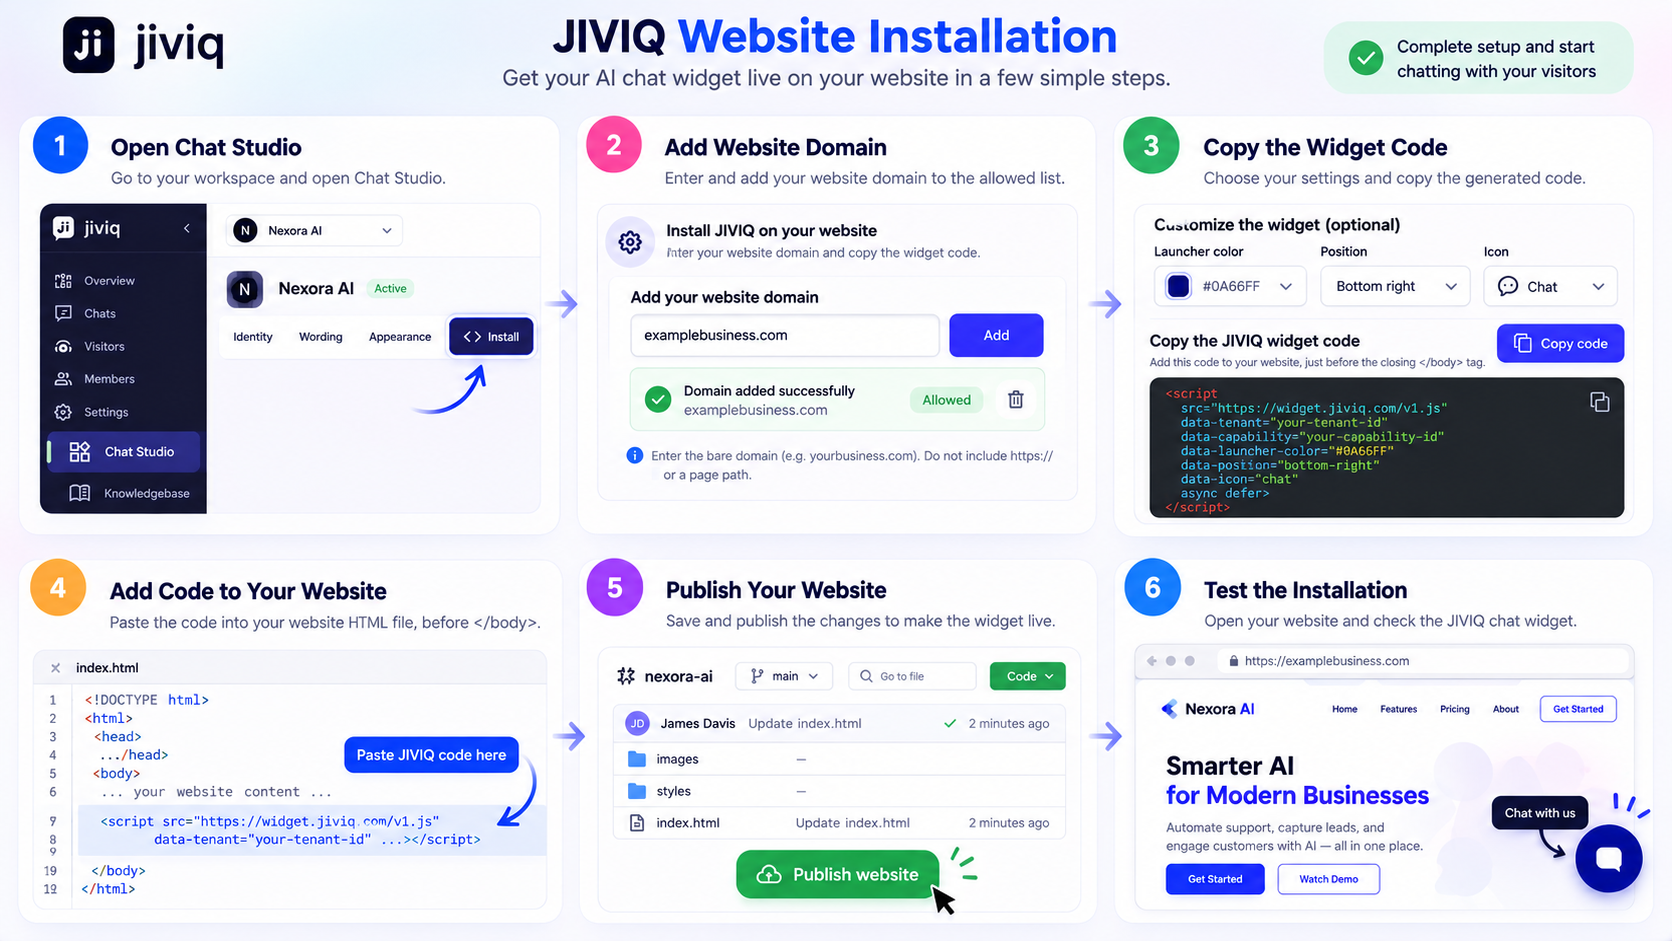
The entire JIVIQ website installation follows 9 clear, sequential milestones:
Log in to your account at app.jiviq.com.
Select the brand Workspace whose Knowledge Base and AI assistant will power the website chat.
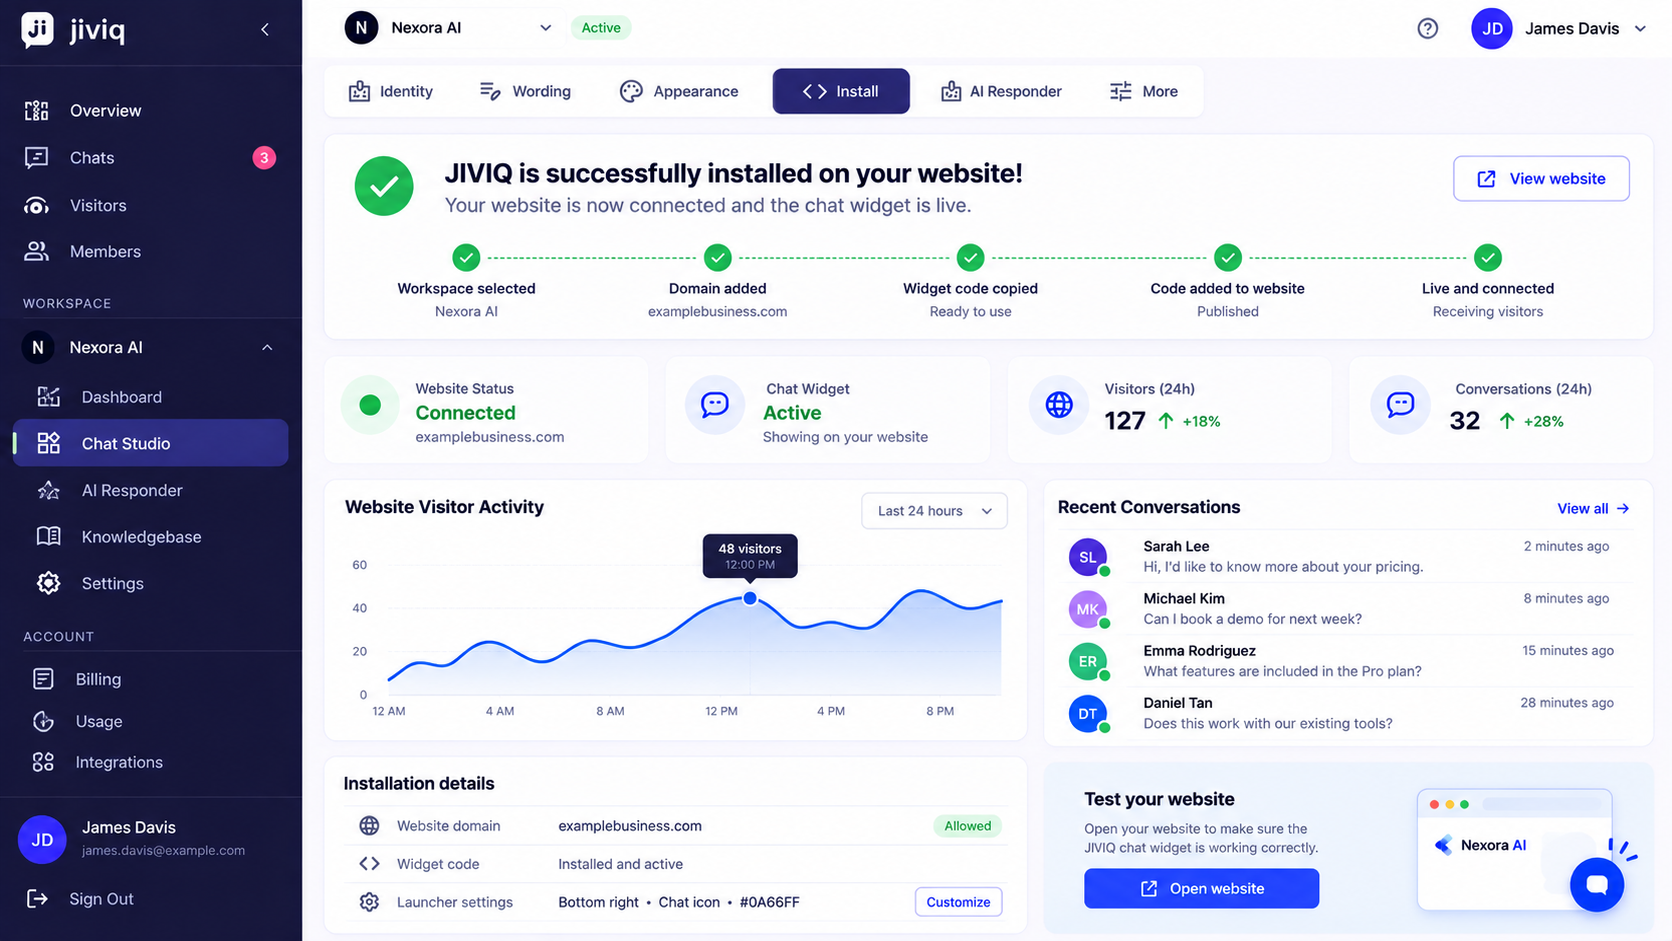
Click Chat Studio in the sidebar and select the Install tab.
Register your bare website domain (e.g., example.com) under Allowed Websites so JIVIQ approves incoming requests.
Click Copy Code to copy your personalized JavaScript snippet containing your unique data-tenant and data-capability keys.
Paste the snippet directly before the closing </body> tag in your website's HTML template or global footer script manager.
Deploy your updated website code or save your CMS theme changes.
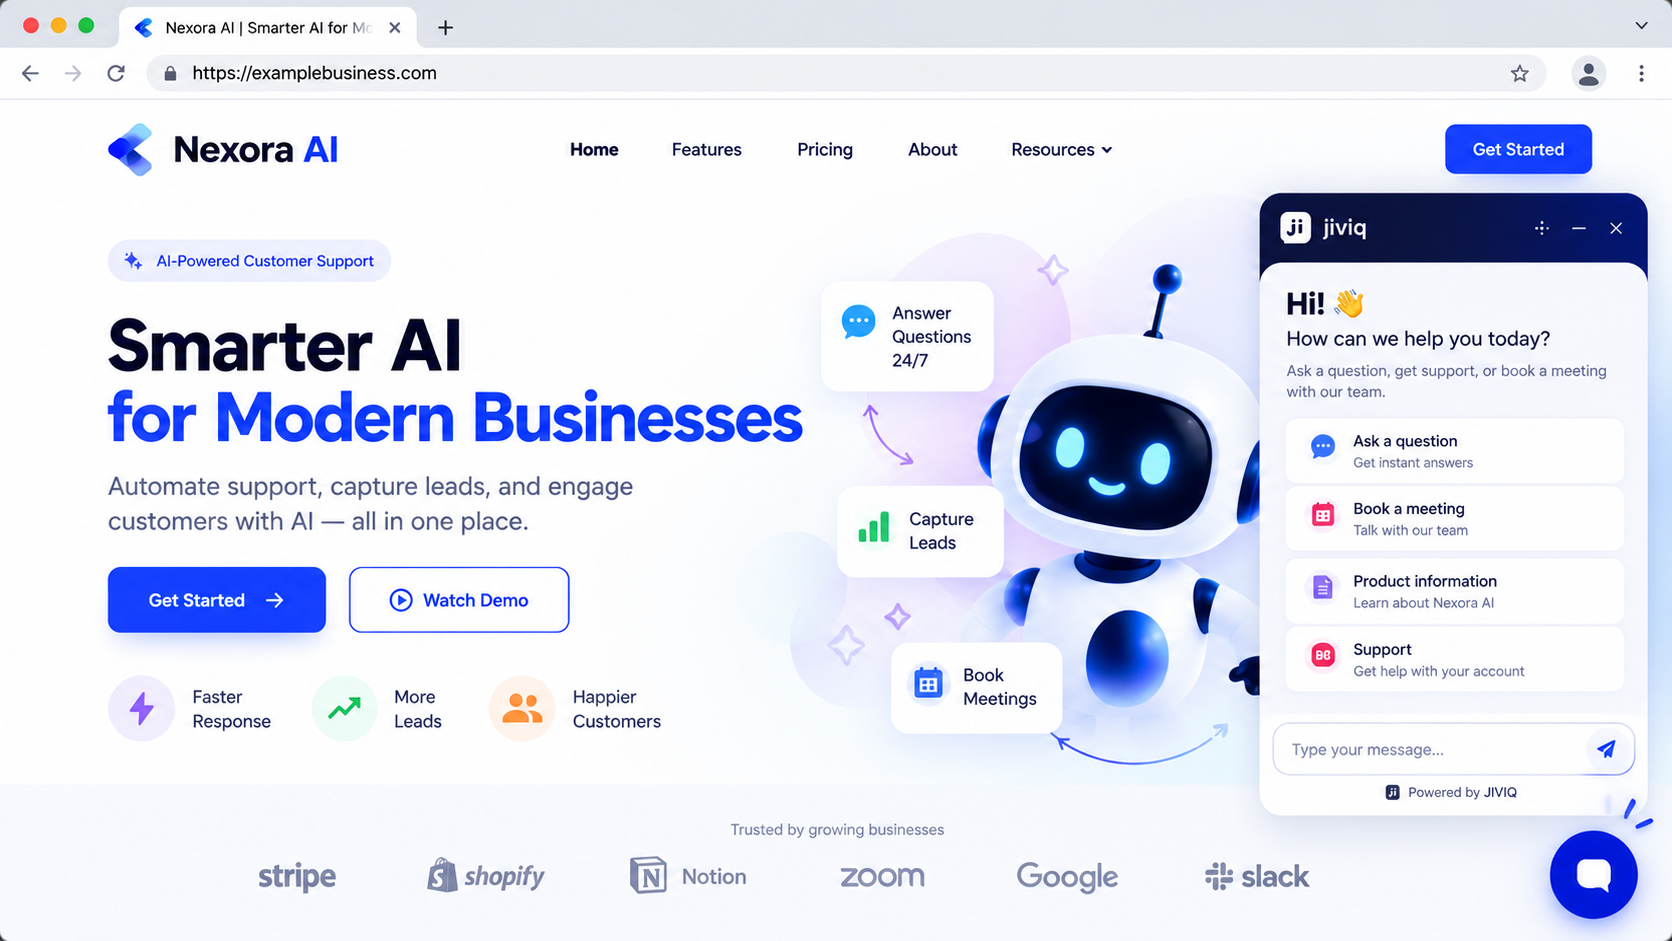
Navigate to your public URL and confirm the circular JIVIQ chat launcher bubble renders in the bottom corner.
Open the chat, send a greeting message, and verify that the conversation immediately streams into your JIVIQ inbox.
3. Real-World Reference: The Nexora AI Website
Throughout this 5-part installation guide, we reference our verified implementation on Nexora AI, a live static showcase website hosted on GitHub Pages at https://jamesdavis.github.io/nexora-ai/.
In our Nexora AI tutorial example, the live snippet used specific keys (data-tenant="nexora-ai" and data-capability="nexora-ai.nexora-ai"). Do not copy these values for your own website. Always copy your own generated code directly from your JIVIQ account dashboard.
4. Supported Website Types
JIVIQ is universally compatible with any web architecture that allows JavaScript script loading:
HTML & Static Hosts
GitHub Pages, Netlify, Vercel, Cloudflare Pages, Astro, Next.js, Gatsby, and pure HTML sites.
WordPress & Webflow
WordPress (Theme Footer or Header/Footer scripts), Webflow Custom Code, Squarespace, and Ghost.
Shopify & E-Commerce
Shopify theme.liquid footer, WooCommerce, BigCommerce, and custom e-commerce checkouts.
If your visitors sign in to your product, you can pass their name and email to the widget so returning customers keep their history. See the widget identity guide.
5. Frequently Asked Questions
Common questions about JIVIQ website installation, prerequisites, and compatibility:
The JIVIQ chat widget is a lightweight JavaScript snippet that connects your website to your JIVIQ account. Once embedded, it loads the interactive chat launcher in the bottom corner of your pages without slowing down load speeds.
No. Installing JIVIQ requires no advanced programming skills. You simply copy your generated one-line script from the JIVIQ dashboard and paste it into your website's HTML or CMS code settings.
For most websites, adding the domain and embedding the widget takes less than 3 minutes. As soon as your site is published, the chat launcher appears immediately.
You need: (1) an active JIVIQ account with an established Workspace, (2) Owner or Admin permissions in JIVIQ to register your domain, and (3) edit access to your website's HTML code, theme settings, or tag manager.
Yes. You can allow-list multiple domains within your Workspace or create distinct Workspaces for separate brand websites under Settings → Workspaces.
Yes. JIVIQ works seamlessly across static HTML websites (such as GitHub Pages or Netlify), CMS platforms like WordPress and Webflow, and modern React/Vue/Astro SPAs.
The flow is: (1) Sign in to JIVIQ, (2) Select your Workspace, (3) Go to Chat Studio → Install, (4) Allow-list your domain, (5) Copy your widget code, (6) Paste before </body>, (7) Publish your site, (8) Open live page, (9) Send a test message.
JIVIQ employs strict domain security. The widget only initializes on domains explicitly registered in your allowed websites list to prevent unauthorized embedding on third-party sites.
We reference our real-world installation on Nexora AI (https://jamesdavis.github.io/nexora-ai/), a live static showcase site, demonstrating real dashboard steps and verification.
Yes. You can add the snippet via your WordPress theme footer settings, a site headers/footers plugin, or Google Tag Manager.
Yes. Any website platform that allows custom code injection or script embedding can host the JIVIQ chat widget.
No. JIVIQ runs asynchronously with scoped styles and self-contained logic, ensuring it never interferes with Google Analytics, CRM tags, or external stylesheets.
Verify that: (1) your exact bare domain is listed under Allowed Websites in JIVIQ, (2) the snippet is pasted before </body>, and (3) your web host cache has refreshed.
For security integrity, JIVIQ widget security requires public domain verification. Localhost testing is not supported for production widgets.
Consult our official documentation at https://jiviq.com/help/website-installation/install-jiviq-on-your-website or email our support team at support@jiviq.com.