Create a JIVIQ Account
Welcome to JIVIQ! Before you can start using JIVIQ, you need an account. Creating an account gives you access to your JIVIQ workspace, where you can configure your settings and get started with the available features.
In this guide, you'll learn how to create your JIVIQ account, what information you need, and what to do if you experience problems during registration.
Before You Create Your JIVIQ Account
You need an email address you can check and about five minutes. The 14-day free trial starts the moment your account is created — no credit card required.
1. A working email address
Use an active work email address that you have direct access to. This becomes your primary login username.
2. A secure password
Choose a password of at least 6 characters that is difficult for others to guess.
3. An internet connection
A stable internet connection helps prevent form submission errors and loading delays during registration.
4. A supported browser
Use a modern, updated web browser (Chrome, Safari, Firefox, or Edge) for optimal performance and security.
5. Access to your email inbox
You will need to open your inbox to click the verification link from support@jiviq.com before signing in.
How to Create a JIVIQ Account
Follow these clear, verified steps to complete your JIVIQ registration:
Sign up
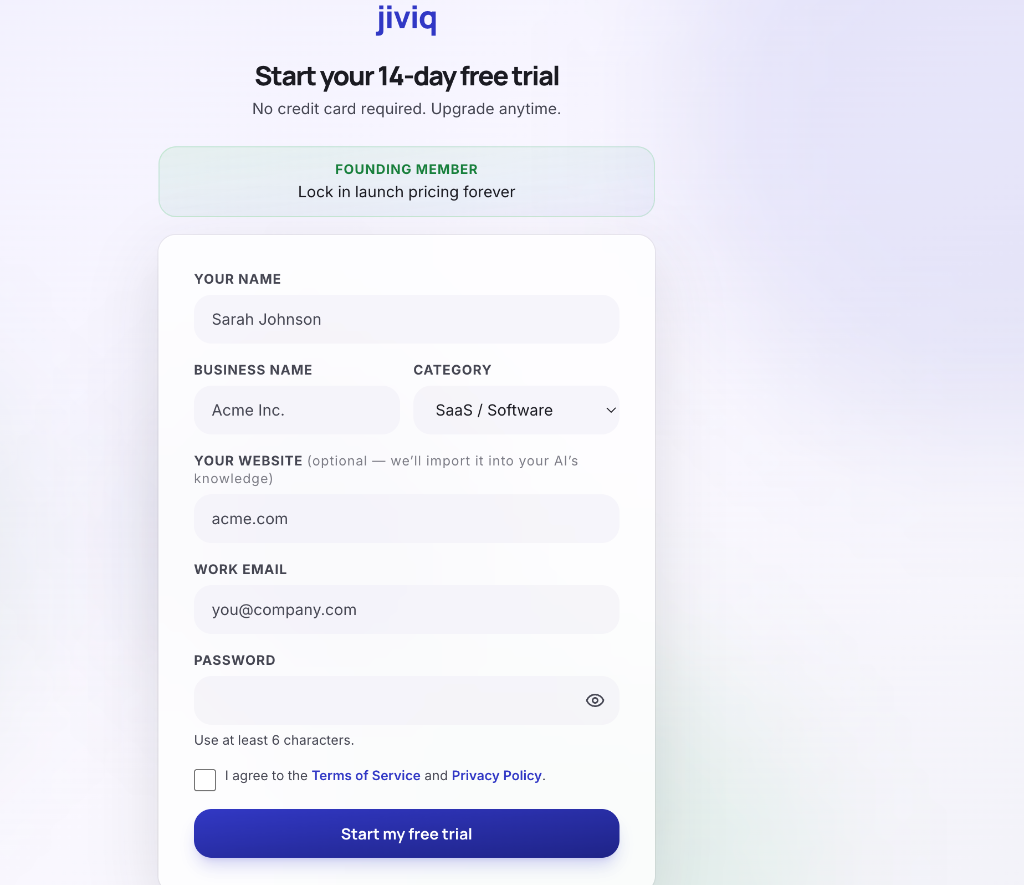
Go to app.jiviq.com/signup and fill in the form:
- check_circle Your name
- check_circle Business name and a category (pick “Other…” if none fit)
- check_circle Work email — this becomes your login, so use an address you can actually receive mail at
- check_circle Password — at least 6 characters
- check_circle Tick the box to accept the Terms of Service and Privacy Policy
Review the Registration Form
The registration page opens cleanly with all required fields clearly labeled. Double-check your details before submitting to ensure there are no spelling errors in your email.
Submit Your Account Details
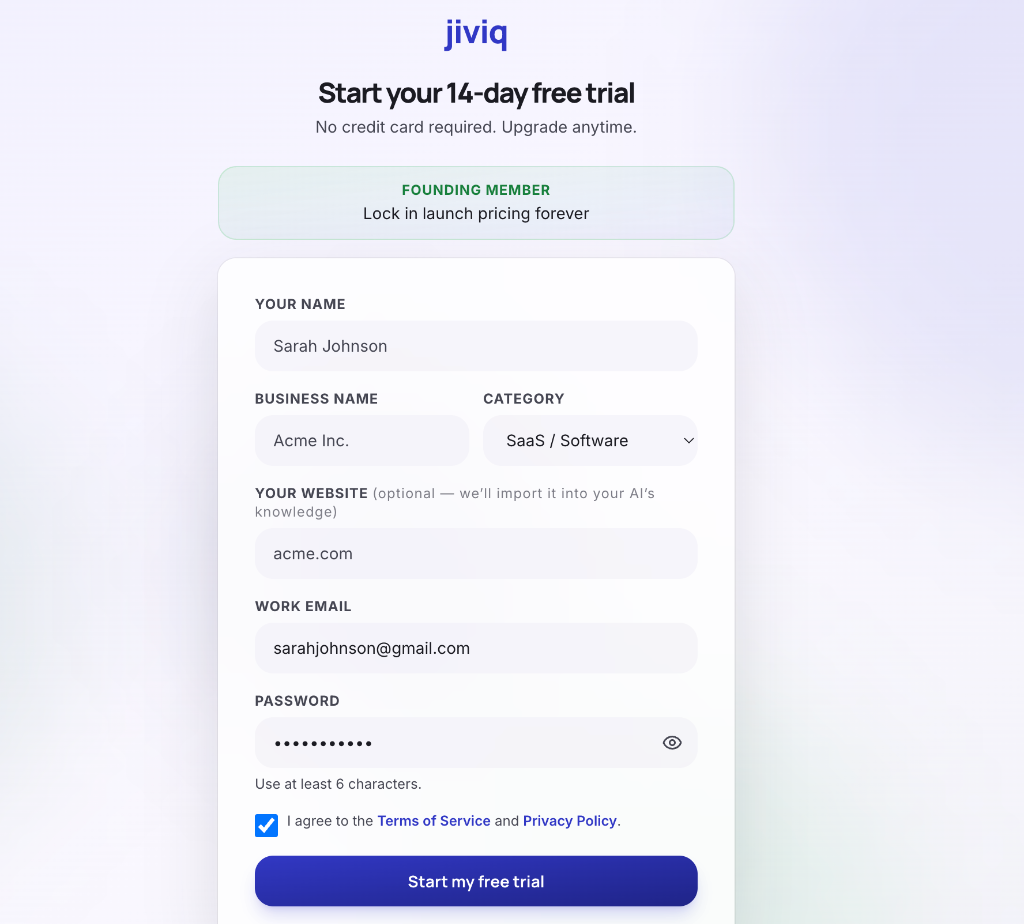
After entering your details and selecting your business category, click Start my free trial. JIVIQ will immediately prepare your account and send a verification email.
Verify Your Email Address
Your account is not created yet — signup finishes only after you verify your email. JIVIQ sends an email with the subject "Verify your email for Jiviq" from support@jiviq.com. Open it and click Verify Email.
Verify your email for Jiviq
Sent from support@jiviq.com. Click the button inside your email to complete registration.
Sign In & Create Your First Workspace
The verification link brings you back to the sign-in page with a green "Email verified" banner. Sign in with your email and password — that sign-in is what actually creates your account. Right after your first sign-in, JIVIQ will prompt you to create your first Workspace with your pre-filled business name.
Email Verified • Account Active!
Signed in at app.jiviq.com. Your 14-day full trial is live.
What Happens After You Create a JIVIQ Account?
After verifying your email and completing your first sign-in, you are ready to make your JIVIQ workspace live for your customers:
- Your Workspace is ready: Each workspace is the front door for your customer chat, AI assistant, and Knowledge Base.
- Install the chat widget: Embed the 1-line script on your website so visitors can start chatting.
- Import your website: Sync your documentation and website pages into the Knowledge Base so the AI has accurate answers.
- Business timezone: JIVIQ automatically sets your business timezone from your browser for meeting and audio call scheduling.
Tips for Keeping Your JIVIQ Account Secure
Follow these practical security recommendations to safeguard your JIVIQ account and customer conversations:
Use a strong, unique password
Create a password with at least 6 characters (10+ recommended) that is unique to JIVIQ and not reused on other platforms.
Do not share your password
Keep your login credentials private. When you need team members to join, invite them with separate team accounts under Settings.
Avoid public or shared devices
Whenever possible, only log in from your trusted computer or mobile phone to prevent unauthorized access.
Sign out after using shared devices
If you must access JIVIQ on a shared computer, ensure you sign out completely when finished and close the browser.
Be alert for unexpected emails
Verify that official JIVIQ account emails always originate from support@jiviq.com or @jiviq.com.
Only log in on official JIVIQ domains
Always confirm the URL in your browser address bar is https://jiviq.com or https://app.jiviq.com before entering your password.
Frequently Asked Questions About Creating a JIVIQ Account
Find answers to 30 common questions regarding account registration, password requirements, security, and workspace setup.
About JIVIQ Accounts
A JIVIQ account gives you access to the JIVIQ platform. After creating an account, you can continue with setting up your workspace and customer communication tools.
An account allows you to access your JIVIQ environment, manage your AI chat widget, audio calls, meetings, and unify all customer context.
No. Creating an account and creating a workspace are separate steps. Your account provides login access to JIVIQ, while a workspace is where your live chat presence, Knowledge Base, and customer timeline live.
Account registration is completed first. Right after your first sign-in, JIVIQ will guide you to create your first workspace using your business name.
Anyone can create a JIVIQ account. It takes about 5 minutes, and starts with a 14-day free trial with no credit card required.
What You Need to Register
To register, you need: Your Name, Business Name, Business Category (or 'Other…'), a Work Email address, and a Password (at least 6 characters).
Yes. Your work email becomes your permanent login username and where your verification link and critical workspace notifications are sent.
Yes, you can use any valid email address that you have direct access to, though a work email is recommended for business branding.
Yes, using your business email address is recommended and ensures seamless team and workspace management.
No. JIVIQ offers a full-featured 14-day free trial with no credit card required at sign-up.
Password and Account Security
Choose a password that is at least 6 characters long (preferably 10+ characters) combining uppercase and lowercase letters, numbers, and symbols.
Ensure your password is at least 6 characters long. Check that there are no accidental spaces before or after your password.
For optimal account security, use a unique password for JIVIQ rather than reusing passwords from other online services.
No. Never share your personal password. Once your account is set up, you can invite team members with their own separate logins under Settings.
It is safer to use your own trusted personal device. If using a shared computer, do not save your password in the browser and sign out after your session.
Common Registration Problems
Check your internet connection, refresh the page, or try using an updated browser without ad-blockers that might block form scripts.
Ensure all required fields (Name, Business Name, Category, Work Email, Password) are completed and the Terms of Service checkbox is ticked.
Check that your email is spelled correctly (e.g. name@domain.com) without spaces or invalid punctuation characters.
If you entered an incorrect email before clicking submit, correct it in the form. If already submitted, simply register again with the correct email address.
Temporary network lag may cause a delay. Wait a few moments, check your connection, and avoid repeatedly clicking the submit button.
Email Verification After Registration
Yes. Your JIVIQ account is officially finalized after you click the verification link sent to your email address from support@jiviq.com.
Check your spam, promotions, or junk folder. The sign-up screen also includes a 'Resend verification email' button (with a 30-second cooldown).
Email verification is required before your first sign-in so JIVIQ can verify your identity and secure your workspace.
Ensure you open the link in the same browser you signed up in, or return to app.jiviq.com/signup and request a fresh verification link.
Read the next guide in this Getting Started sequence: Verify Your Email.
What to Do After Registering
Verify your email, sign in at app.jiviq.com, and create your first workspace to start setting up your AI chat widget, Knowledge Base, and customer tools.
Right after your first sign-in, JIVIQ prompts you with a pre-filled workspace name matching your business. Click 'Create Workspace' to finish setup.
Yes! Once you verify your email and sign in, you have full access to your 14-day free trial features.
If you already have an account, go directly to https://app.jiviq.com/login and enter your credentials instead of registering again.
Contact the JIVIQ support team directly via support@jiviq.com.