How to Verify Your Email
After you sign up for JIVIQ, you need to verify your email before your account setup is complete. This guide walks you through finding the verification email, verifying your address, and finishing your first sign-in.
Email verification confirms that you can access the email address entered during registration and protects your account before workspace configuration begins.
Before You Verify Your Email
Before completing email verification, make sure you have the following ready:
1. Email Account Access
Access to the email address used during signup to open incoming messages.
2. Original Browser & Device
The browser/device used to start signup, if possible, for instant session resumption.
3. Your JIVIQ Signup Information
The work email address and password chosen during registration to complete your first sign-in.
Step-by-Step Email Verification Instructions
Follow these verified steps to find your verification email, click the confirmation link, and complete your sign-in:
Open the JIVIQ Signup Page
Registration begins at https://app.jiviq.com/signup. If you have already submitted the registration form, continue with the verification steps below instead of creating another account.
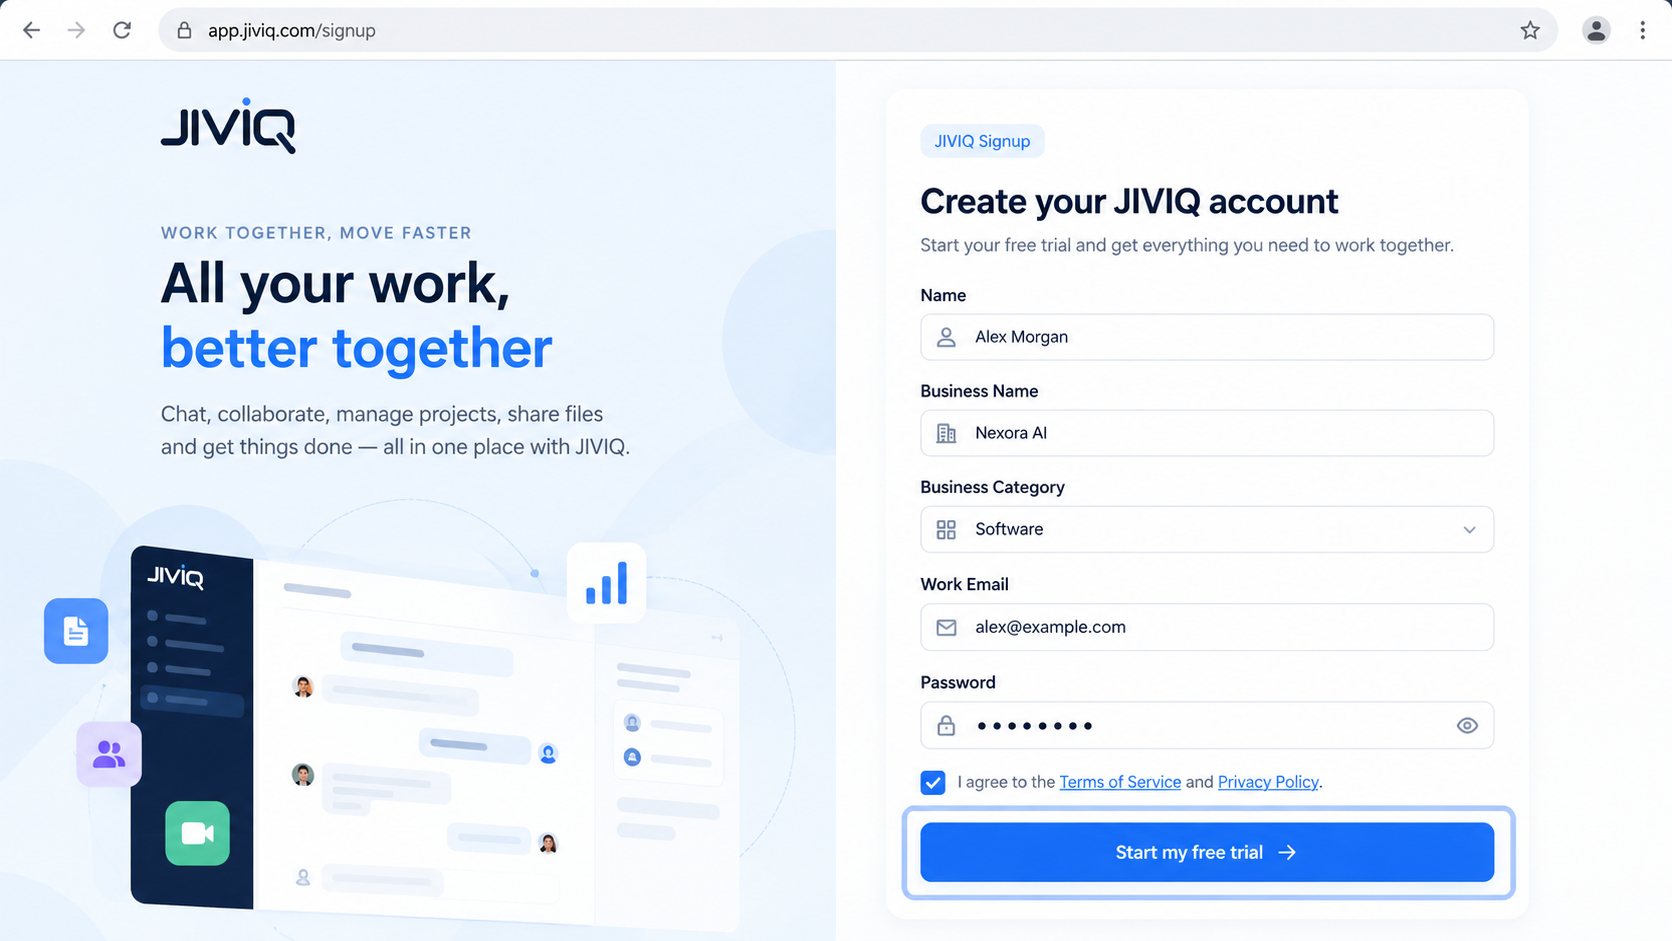
app.jiviq.com/signup before email verification. Check Your Email Inbox
After submitting the signup form, check the email inbox for the address you used during registration. Look for an official email with:
support@jiviq.com 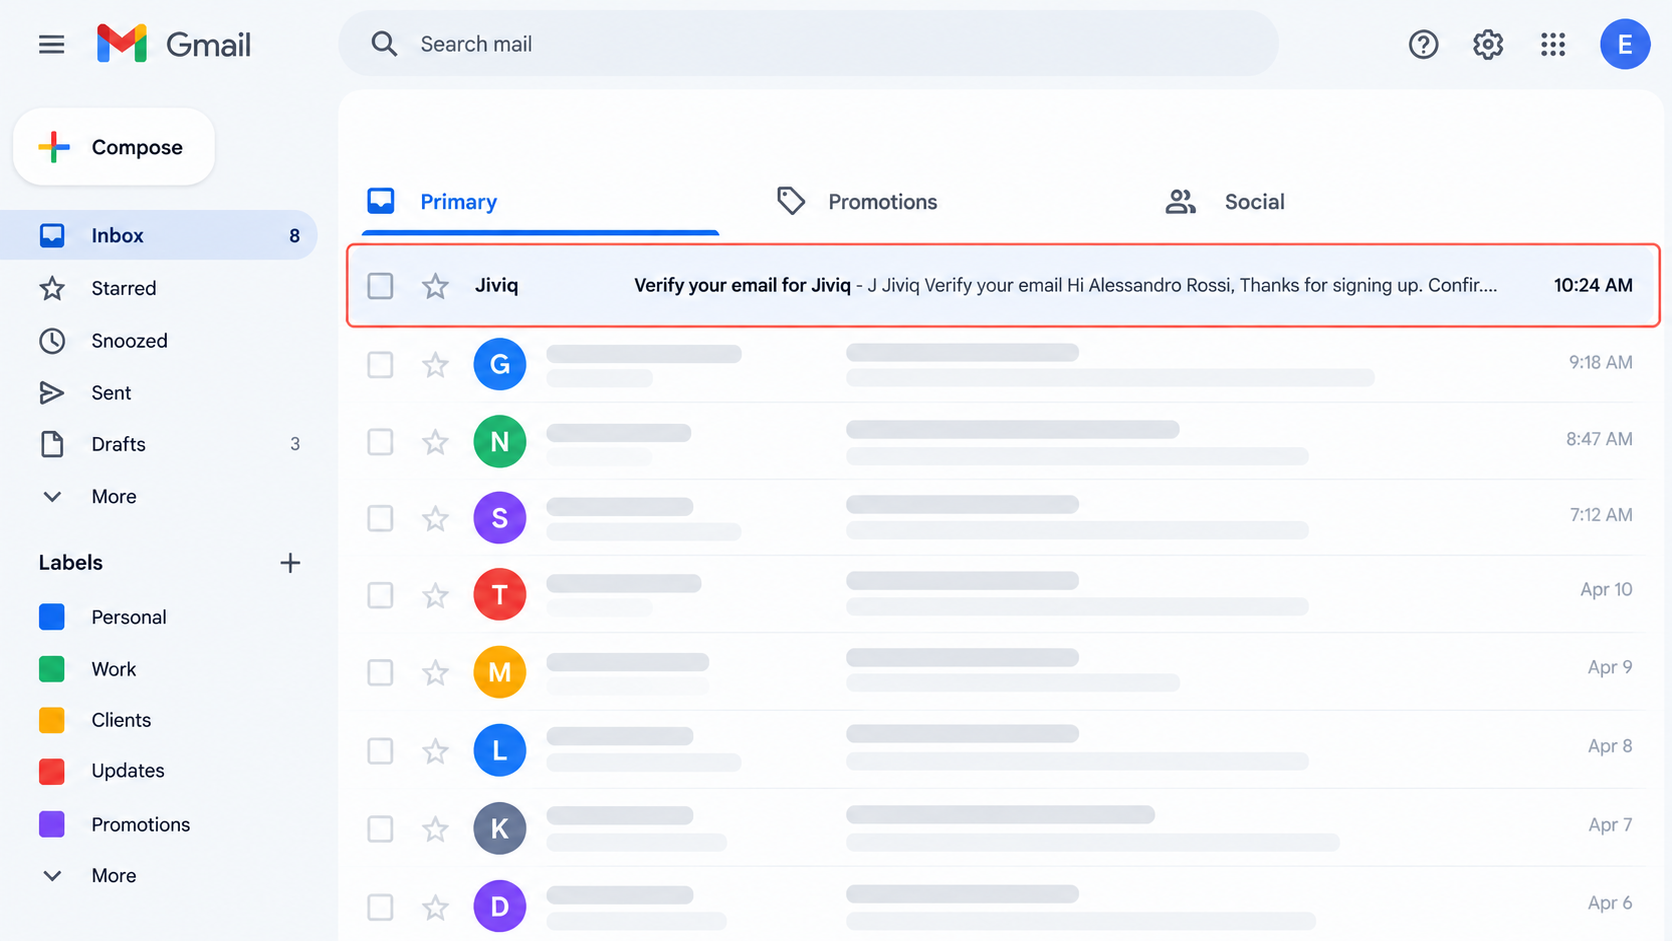
support@jiviq.com with subject "Verify your email for Jiviq" in inbox. Open the Verification Email
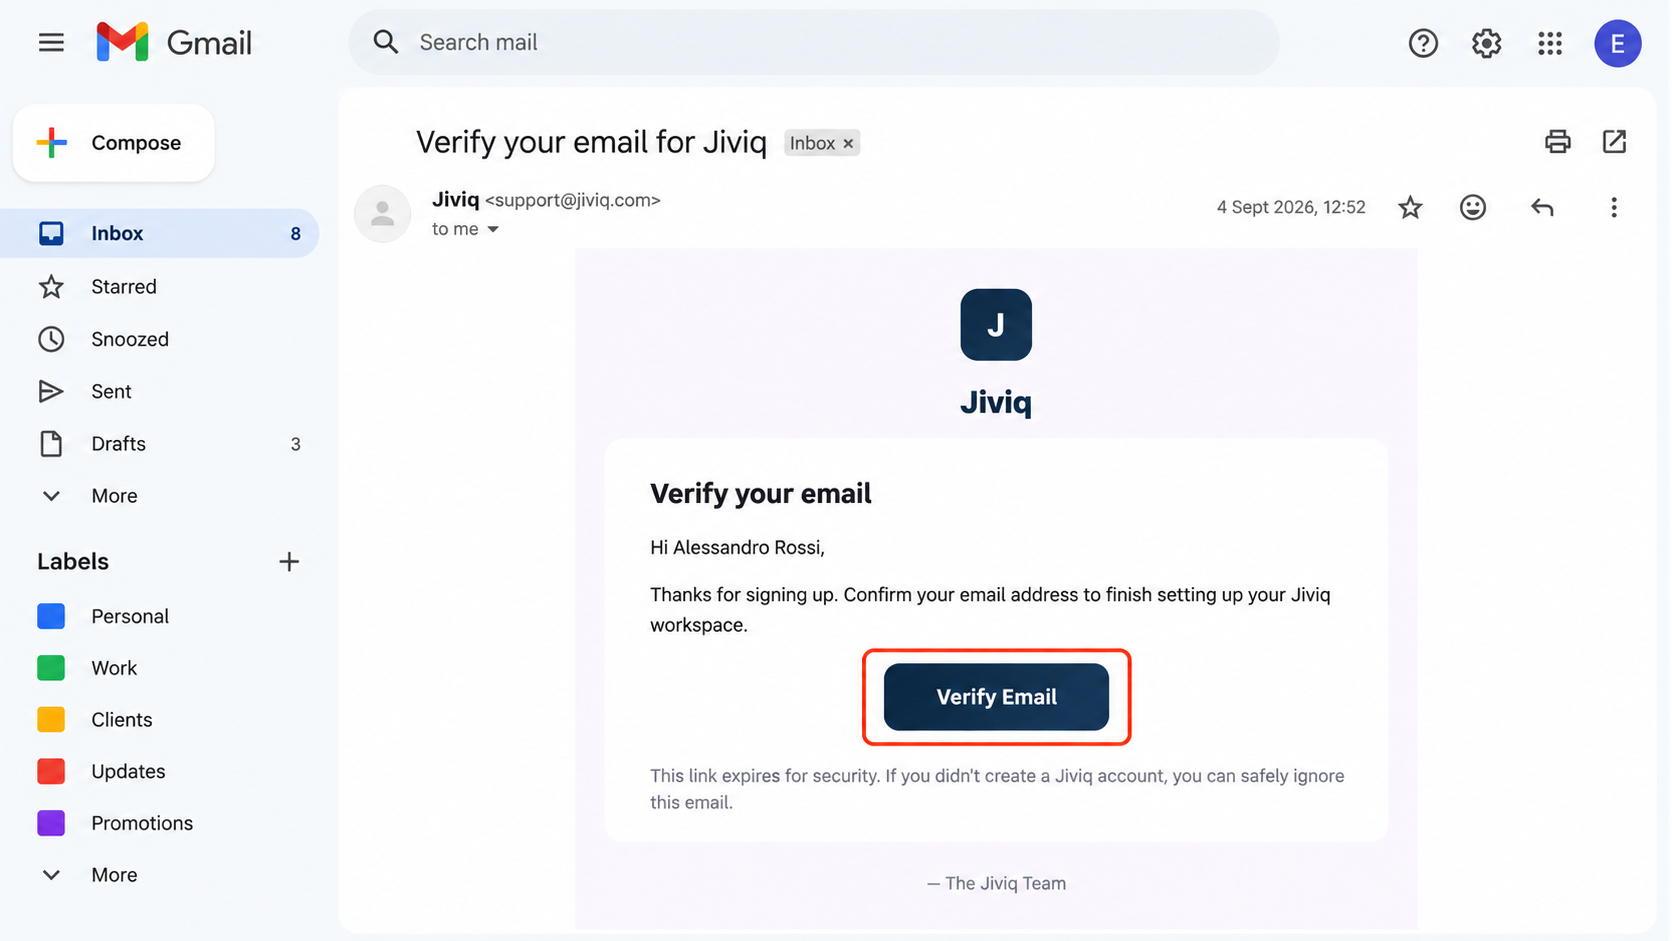
Open the email titled "Verify your email for Jiviq". Confirm that the message originates from support@jiviq.com, then locate the prominent "Verify Email" button.
Click "Verify Email" and Confirm
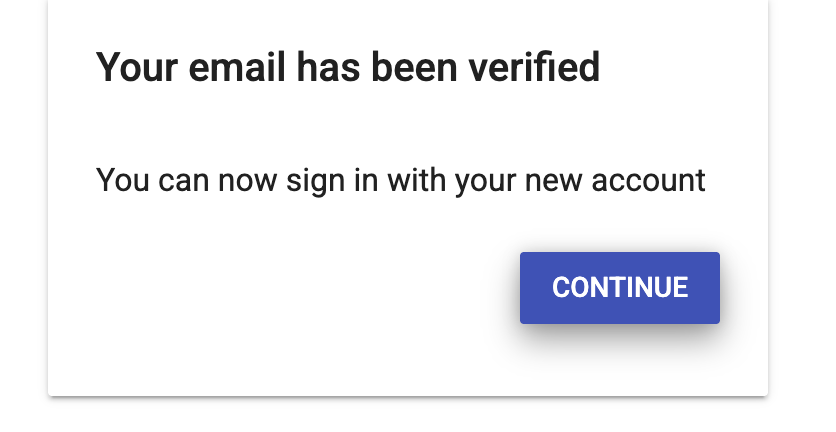
Click the "Verify Email" button in the email message. Once clicked, a dedicated confirmation screen opens in your browser confirming:
If you clicked the verification link on another device (such as your phone), tap CONTINUE, then return to your original signup browser to sign in.
Sign In to Finish Creating Your Account
After verification, you will return to the JIVIQ sign-in page. Enter your work email address and password chosen during signup, then sign in.
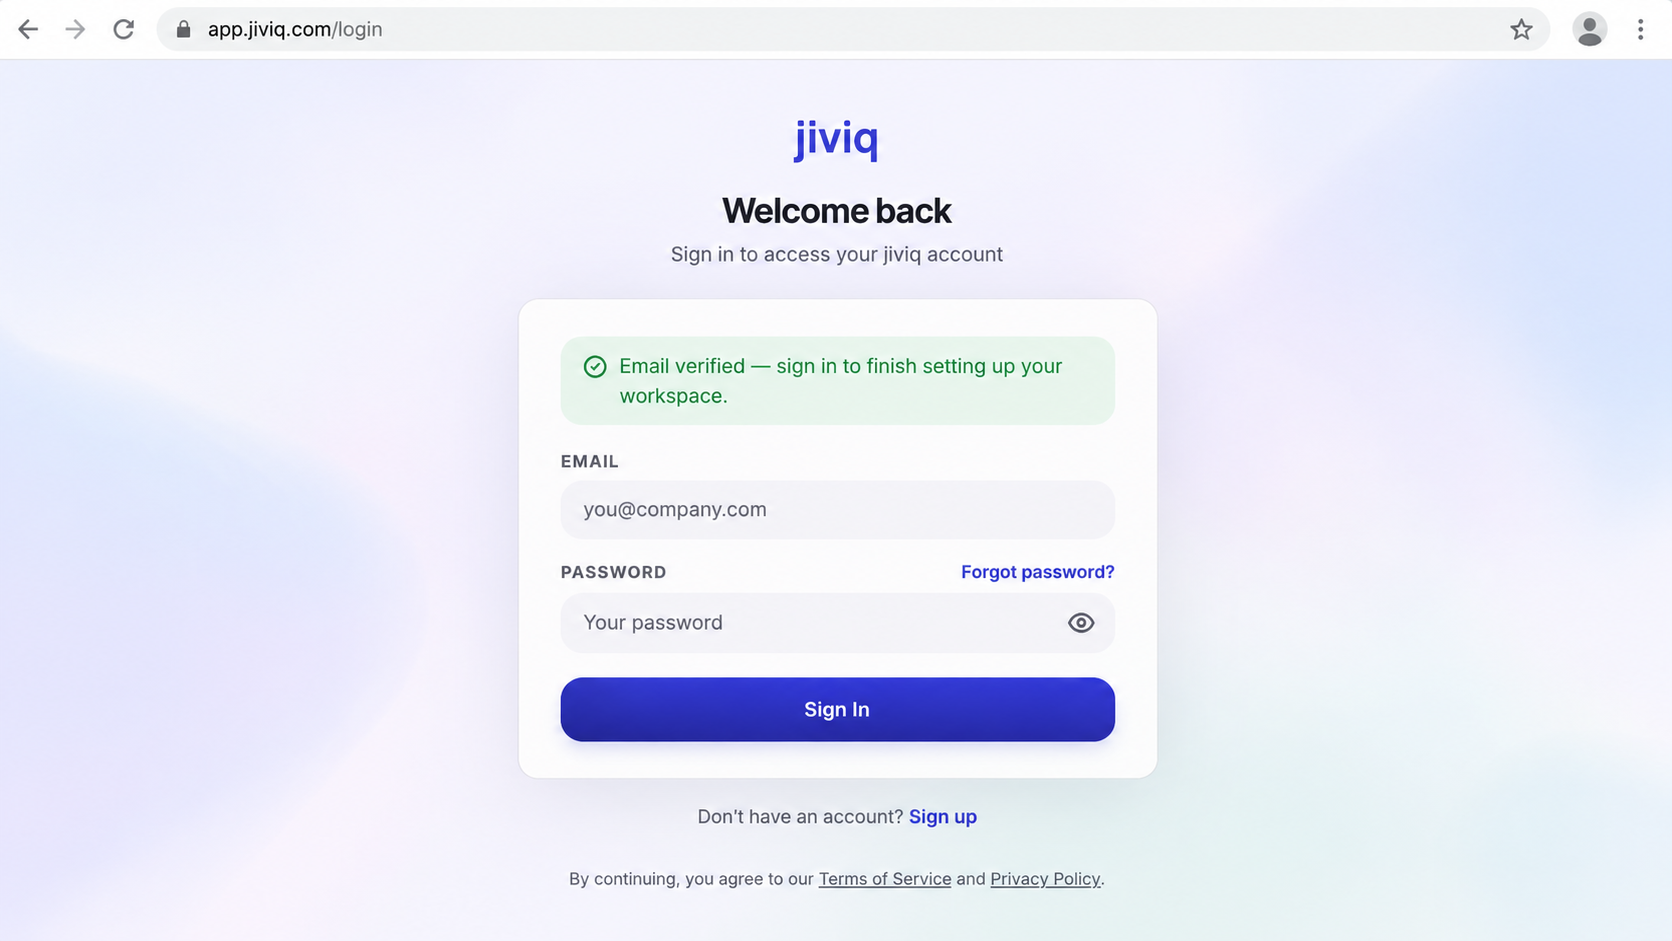
app.jiviq.com/login where you log in with your credentials to finalize account creation. What Happens After Email Verification?
After you verify your email and sign in successfully, JIVIQ asks you to create your first Workspace.
A Workspace is the front door for your customer chat. Each Workspace has its own:
Dedicated Chat Link
Direct conversational link to share with prospects and clients.
Widget Code
One-line snippet to embed live AI customer chat onto your website.
Knowledge Base
Upload product documents and URLs for verified AI answers.
Brand AI Assistant
An AI assistant configured to speak in your brand's unique voice.
Didn't Receive the Verification Email?
If the verification email does not appear in your inbox right away, follow these verified troubleshooting steps:
Automated transactional messages are occasionally filtered by email security rules.
If your email client (like Gmail) uses inbox tabs, check the Promotions or Updates tab.
Network routing and mail server delivery can occasionally take a couple of minutes.
Keep the signup browser tab open to request a new message.
Click the resend button on the signup page to trigger a fresh verification email.
JIVIQ enforces a 30-second cooldown between resend requests to prevent deliverability issues.
If you still cannot find the message, see JIVIQ's Login and Signup Troubleshooting guide.
Why Should I Use the Same Browser?
JIVIQ saves the details entered during signup in the browser where signup was started.
Therefore, using the verification link on the same device and browser makes it possible to finish the process without entering the signup information again.
If the verification link was opened elsewhere (e.g. on your phone), simply return to the original signup browser on your computer and sign in there after verification.
Email Verification vs. Account Creation
New users often assume that submitting the signup form immediately creates the account. Here is how JIVIQ's two-step process works:
| Email Verification | Account Creation |
|---|---|
| Confirms access to the email address used during signup. | Completed when the user signs in after successfully verifying their email. |
| Triggered by clicking the link in the verification email. | Triggered by logging in at app.jiviq.com/login. |
| Prevents unauthorized registration with unverified email addresses. | Provisions the account and prepares Workspace initialization. |
Common Email Verification Problems
Quick solutions to the most common email verification issues:
I can't find the verification email
Check Inbox, Spam, and Promotions. Wait a few minutes and use Resend verification email on the signup screen.
The verification email has not arrived after waiting
Use Resend verification email. JIVIQ applies a 30-second wait between resend attempts.
I opened the verification link on another device
Return to the browser where you originally signed up and sign in there to finish.
I verified my email but don't know what to do next
Return to the JIVIQ sign-in page and sign in with the email and password you chose during signup.
I see an email verification message when trying to sign in
If signup was started but the verification link was never clicked, return to the signup flow using the same email and password to request a fresh verification email. See the Login and Signup Troubleshooting guide.
I don't remember which email address I used
Try the email address you entered during signup. If you are still unable to access the account, use JIVIQ's official troubleshooting or support route.
Still Need Help?
If you've followed the troubleshooting steps and still cannot complete signup or verification, contact JIVIQ support.
Contact JIVIQ Support
Email: support@jiviq.com
Please include:
- The email address you are trying to use.
- The exact error or message you see.
- A screenshot if helpful.
Never send your password to support or anyone else.
Frequently Asked Questions
Browse questions by category to find answers about JIVIQ email verification:
Email verification confirms that you can access the email address used during JIVIQ signup.
After submitting the JIVIQ signup form, check your email for the verification message and click "Verify Email."
No. JIVIQ's signup process finishes after you verify your email and then sign in.
Verify the email address you used during JIVIQ signup.
Use the official JIVIQ signup page: https://app.jiviq.com/signup
"Verify your email for Jiviq"
The verification email is sent from support@jiviq.com.
Check your Inbox, Spam folder, and Promotions folder if your email provider uses one.
It can take a few minutes to arrive.
Yes. The JIVIQ signup screen includes a "Resend verification email" button.
Open the email and click "Verify Email."
Yes. JIVIQ recommends opening it on the same device and browser used during signup.
The information entered during signup is saved in that browser. Using the same browser allows you to finish without entering the information again.
Return to the browser where you started signup and sign in there after verification to finish the process.
You are returned to the JIVIQ sign-in page, where you can sign in with the email and password you chose during signup.
It confirms that your email verification was successful. The confirmation screen displays "Your email has been verified" and "You can now sign in with your new account" with a CONTINUE button to proceed directly to sign-in.
Yes. Sign in using the email address and password you selected during signup.
You sign in through the JIVIQ admin app at: https://app.jiviq.com/
JIVIQ asks you to create your first Workspace.
Sign in to JIVIQ and create your first Workspace.
Check your Inbox, Spam, and Promotions folders. Wait a few minutes and use "Resend verification email" on the signup screen.
The signup screen has a 30-second wait between resend attempts.
Use the resend option and check your email folders again. If you still cannot complete verification, see JIVIQ's Login and Signup Troubleshooting guide at https://jiviq.com/help/login-troubleshooting.
Return to the signup flow using the same email and password. JIVIQ can send a fresh verification email.
Review the troubleshooting steps first. If the issue continues, contact JIVIQ support at support@jiviq.com.
No. Never share your password with other people.
Check the email address you entered and follow the available signup instructions. If you cannot complete the process, contact JIVIQ support.
You need access to the email address used during signup because the verification message is sent there.
No. Never send your password to support.
See the official JIVIQ Login and Signup Troubleshooting guide or contact support@jiviq.com.
Continue Getting Started with JIVIQ
Follow the official four-step sequence to configure your JIVIQ customer operating system:
What Is JIVIQ?
Understand JIVIQ's customer communication tools, real-time translation, and context platform.
Create a JIVIQ Account
Learn how to register for JIVIQ, fill in your business details, and solve sign-up issues.
Verify Your Email
Find the verification email, click Verify Email, and finish your first sign-in.
Create Your First Workspace
Learn how to set up your first company workspace and prepare JIVIQ for daily use.